Creating a rubric or grading form and sharing it with the account
Creating a rubric
- From the admin dashboard, select the account name. Then select the Rubric/Form Library tab at the top.
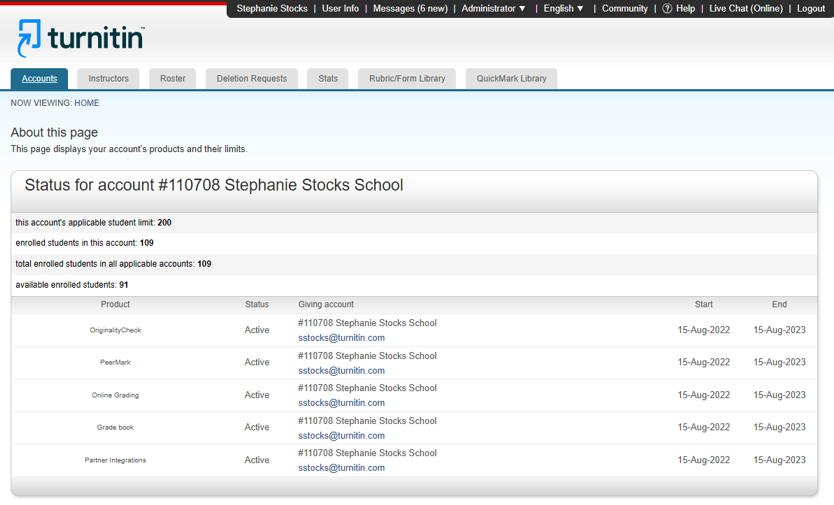
- Select the menu at the top left of the Rubric and Form Manager. From the dropdown that appears, select Create new rubric.

- A blank rubric template will open.
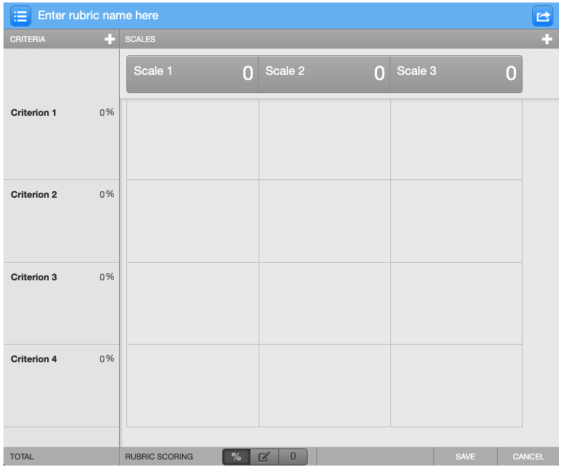
- Create a name for your rubric. Select the Enter rubric name here field and start typing to create a name for your rubric. When finished, select anywhere outside of the field.
- Choose the type of rubric you would like to create by selecting one of the icons in the Rubric Scoring section at the bottom of the screen.
-

-
 Standard rubric
-
 Custom rubric
-
 Qualitative rubric
Learn more about types of rubrics.
- Edit the Criteria information on the left.
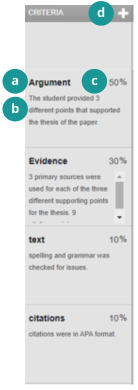
- To edit a criterion's title, select the bold title.
- To edit a description to a criterion, select the space below it.
- To add weight to the criterion, select the percentage value to the right of the title.
Each weight you assign to each criterion should add up to the total possible points in an assignment.
- To add an extra criterion row, select the + plus icon at the top right of the column.
- To delete a criterion row, hover over the area and select the trash can icon.
- Set the values in the Scales row at the top.

- To edit a scale title, select it.
- To edit a scale value, select the number beside the title.
- To add a scale column, select the + plus icon at the top right of the page.
- To delete a scale column, hover over the area and select the trash can icon.
While you can assign decimal values to a rubric, once applied to a grade the decimal will be rounded to the nearest whole number.
- Set the descriptions for the rubric items in your grid.
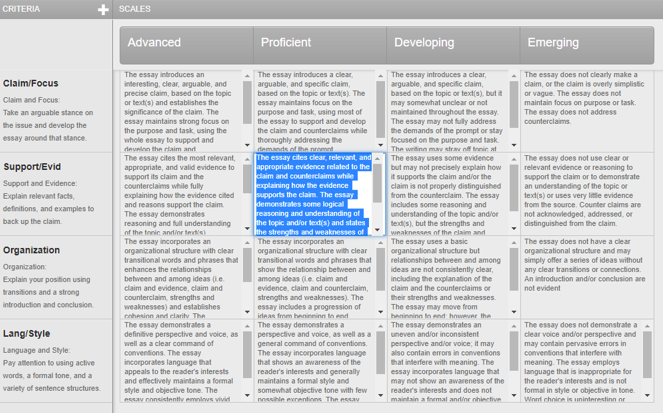
- Select a square to edit the contents.
- When complete, select Save at the bottom right of the screen.

- From the admin dashboard, select the account name. Then select the Rubric/Form Library tab.

- Select the menu at the top left of the Rubric and Form Manager. From the dropdown that appears, select Create new grading form.

- A blank grading form template will open.
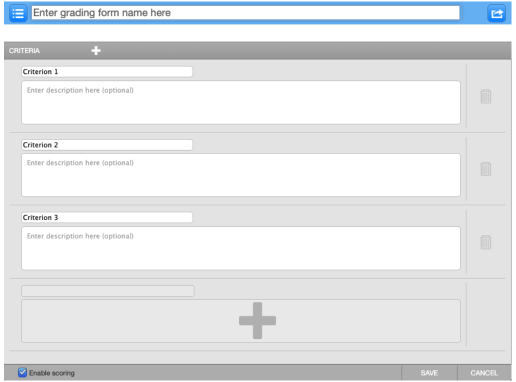
- Create a name for your grading form. Select the Enter grading form name here field and start typing to create a name for your grading form. When finished, select anywhere outside of the name field.
- Edit the Criteria values.
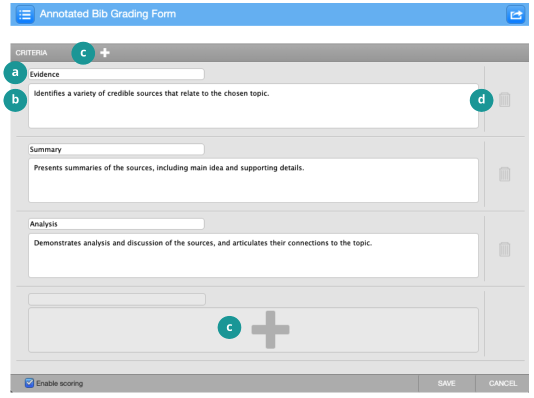
- To edit criteria names, select a field.
- To edit criteria descriptions, select a text field.
- To add additional criteria, select the + plus icon at the top or the bottom.
- To delete criteria, select the trash can icon to the right.
- If you would like to use the grading form simply for adding comments to the assignment criteria, you can disable scoring. At the bottom left, deselect the checkbox to disable scoring.

- When you're finished, select Save at the bottom right to save the grading form.
Sharing out to the account
Existing rubrics and grading forms can be shared out to the entire account or to particular sub-accounts as needed.
Your account (and users) has access to pre-formatted rubrics that they can use if they do not want to create their own.
- Once you, the Turnitin admin, have created the rubric or grading form that you want to share, select the white arrow pointing to the right in the upper-right side of the screen. Then choose Share to account.
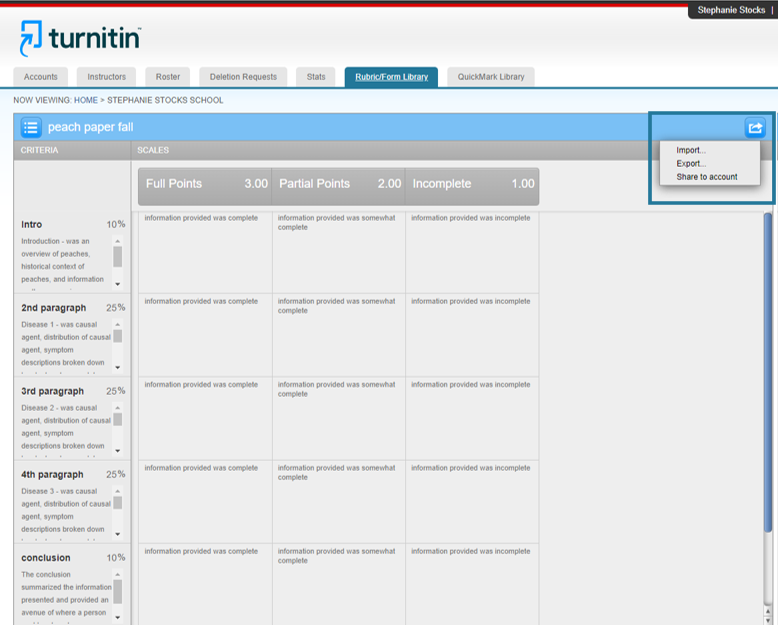
- If an instructor or instructional designer has created a Turnitin rubric or grading form that you would like to share to the entire account, have them export the rubric or grading form. To export, select the same white arrow icon
 and choose the Export option. The file downloads as an .rbc file type. Once they export the file, they can send it to you to Import.
- To Import, select that same white arrow icon
 and choose the Import option. Once imported, select the icon again and choose Share to account to make that rubric available to the entire account.