Your iThenticate/Crossref Similarirty Check guidance is moving!
We’re migrating our content to a new guides site. We plan to fully launch this new site later in July. You can preview the new site now. To help you get up to speed with the new guidance structure, please visit our orientation page .
Managing users
The Users area will allow you to manage the users attached to your account.
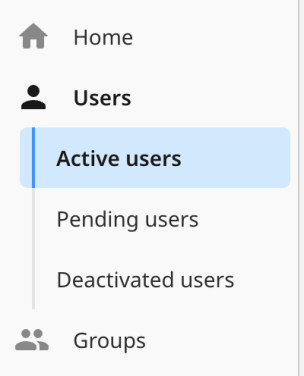
When you select the Users tab from the side menu it will open the Active users page by default.
Use the side menu to select which set of users you wish to manage:

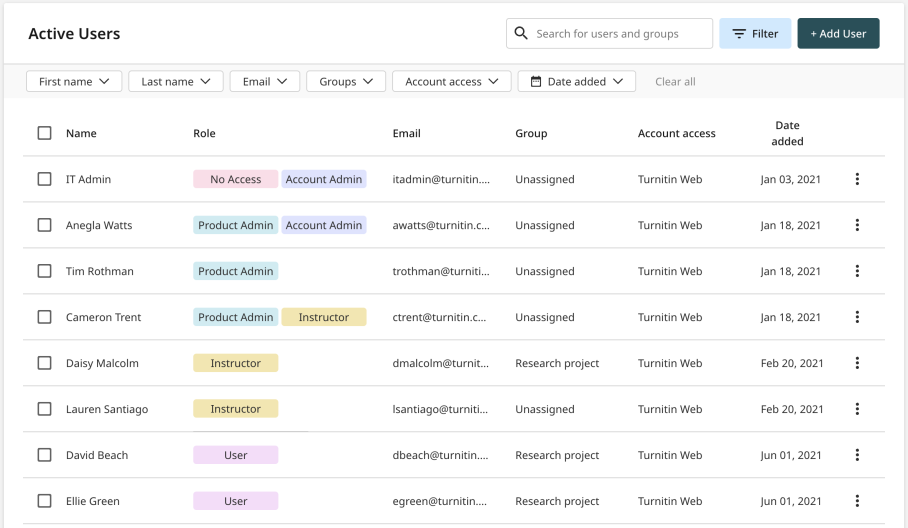
From each of these pages you can search for specific users or groups using the search bar or filter the users shown by using the filter drop downs along the top of the page.
You can add users by selecting the + Add User button.
Manage Active Users
The Active users page shows the active users for the account.
This page will tell you the user’s name, role, email, assigned group, access method, and the date the user was added to the account.

Select the three dots to the right of the user’s details to open the user management menu. From this menu you can edit a user’s details, deactivate the user, or delete the user.
To deactivate or delete more than one user at the same time select the checkboxes next to the names of the users you wish to perform this action for. Once selected, the options to Deactivate or Delete will appear at the top of the page.

If you would like to select all the user’s for this account, select the checkbox at the top of the table.
Manage Pending Users
The Pending users page shows the users who have been invited to this account but have yet to sign up using the invitation email.
This page will tell you the user’s name, role, email, assigned group, invitation status, and the date the user was added to the account.

Select the three dots to the right of the user’s details to open the user management menu. From this menu you can edit a user’s details, resend the invitation email, or delete the user.
To resent the invitation to or delete more than one user at the same time select the checkboxes next to the names of the users you wish to perform this action for. Once selected, the options to Resent Invitation or Delete will appear at the top of the page.

Manage Deactivated Users
The Deactivated users page shows the users whose accounts have been deactivated. Deactivated users do not have access to the account.
This page will tell you the user’s name, role, email, assigned group, access method, and the date the user was added to the account.
Select the three dots to the right of the user’s details to open the user management menu. From this menu you can edit a user’s details, reactivate the user, or delete the user.
To reactivate or delete more than one user at the same time select the checkboxes next to the names of the users you wish to perform this action for. Once selected, the options to Activate or Delete will appear in the top menu.

Was this page helpful?
We're sorry to hear that
If you have the time, we'd love to know how we could improve it.
The guide
